• Blog
  • About
  • Recipes
  • Tips & Tools
  • International LOVE
  • Love Notes
  • Shop
  • Powered by MSI Media Group

Engaging stories of love, joy, comfort and friendship with proven scrumptious, healthy recipes, we celebrate LOVE as the secret ingredient for wonderful food!

Shakshuka

December 22, 2019 by Mary 4 Comments

Shakshuka in a white serving bowl.
Shakshuka!

Shakshuka. The name is a bit of a tongue twister, but do learn to say it and make it! This shakshuka recipe is so good, you’ll find yourself making it again and again. It is relatively easy and a perfect brunch dish – or even dinner on a busy weeknight. Paired with a good piece of toasted bread, preferably sourdough, along with some good country sausage, and you’re all set!

Shakshuka hails from North Africa, and traveled all along the middle East, now has become ever so hip and popular here.

Perfect for holiday brunches

With the holidays upon us, I thought you would enjoy this recipe especially for those of us welcoming houseguests and relatives. I’ve made this several times for “sleepovers” and here’s just a few of the comments – “thank you Mary for a most memorable brunch” – from a hard-to-please big brother, and then there was, “Gee I feel like I’m at an expensive Bed and Breakfast!” from new friends, and “delicious brunch spread” from a sister-in-law.

So please enjoy and feel free to alter ingredients – the kinds of peppers and cheeses – for example. Do use only the real San Marzano tomatoes, making sure your can says “D.O.P.” to insure they are genuine. You can use regular paprika but I prefer the sweet smoked kind from Spain. My husband never like smoky things, except for salmon and whitefish, so now at least I can use it with abandon, although I’d rather have him around. 🙁

Shakshuka in skillet with raw eggs.
Shakshuka in skillet with raw eggs
Shakshuka in skillet with cooked eggs.

SHAKSHUKA – serves 3 – 4

3 tablespoons extra-virgin olive oil, plus more for drizzling
1 medium onion, thinly sliced (use a hand mandoline)
1 large green pepper, stems, seeds, and ribs removed, thinly sliced
2/3 of one fresh small jalapeño chili including seeds and ribs, thinly sliced
3 cloves garlic, thinly sliced
1 1/2 tablespoons sweet smoked Spanish paprika
2 teaspoons whole cumin seeds
1 28-ounce can whole peeled San Marzano tomatoes, crushed by squeezing with your hands
3 – 4 oz. feta cheese, cubed in ¼” pieces or crumbled
Kosher salt and freshly ground black pepper to taste
Large handful of chopped cilantro or parsley, or a mix
6 – 8 eggs
Crusty bread, for serving, preferably sourdough, toasted
Country sausage for serving – optional

The process

Heat olive oil in a large, deep skillet or straight-sided sauté pan over medium high heat until shimmering.

Add onion, green pepper, and jalapeño chili and spread into an even layer. Cook, without moving, until vegetables on the bottom are deeply browned and beginning to char in spots, about 6 minutes. Flip vegetables and continue to cook until vegetables are fully softened and spottily charred, about another 4 minutes.

Add garlic and cook, stirring, until softened and fragrant, about 30 seconds. Add paprika and cumin seeds and cook, stirring, until fragrant, about 30 seconds.

Immediately add tomatoes and stir to combine. Reduce heat to a bare simmer and simmer for 10 minutes, then season to taste with salt and pepper. Remember the feta is salty, so do not add too much salt.

Add the feta now and some of the parsley and/or cilantro, saving enough to garnish finished servings. Stir all to combine nicely.

Using a large spoon, make a well near the perimeter of the pan and break an egg directly into it. Spoon a little sauce over edges of egg white to partially submerge and contain it, leaving yolk exposed. Repeat with remaining 5 – 7 eggs, working around pan and into the middle as you go.

Cover, and reduce heat to lowest setting, and cook until egg whites are barely set and yolks are still runny, 6 to 8 minutes.

Serve 2 eggs with sauce in large shallow bowls as shown.

Shakshuka serving with sausage and bread.
Shakshuka serving with sausage and bread

Garnish with cilantro or parsley. Serve immediately with crusty bread and LOVE. A side of sausage is lovely to go along with this. And have your serving bottle of EVOO on the table for those who want a little more oil. Be prepared for silence and ummm’s.

Enjoy!! And Happy Holidays!

Filed Under: Breakfast, Brunch, Dinner, Vegetables Tagged With: brunch, eggs, feta cheese, Mediterranean Food, Shakshuka, tomatoes, weeknight dinner

Sauteed Zucchini with Onions and Radishes, topped with Feta and Oil-cured Moroccan Olives

December 15, 2013 by Mary Frances 26 Comments

More and more people are asking me for vegetable recipes. For myself, I am forever on the quest to find new and interesting combinations. With the holidays coming and all the rich food that is starting to show up at parties, I thought a new and unusual vegetable dish could do everybody a little good. I had this beautiful bunch of multicolored radishes, some zucchini and a sweet Spanish onion. So I put together this dish, Sauteed Zucchini with Onions and Radishes, topped with Feta and Oil-cured Moroccan Olives.

Radishes are usually eaten cold and crisp, by themselves, with a touch of salt or used as dipping instrument. But ever since Mark Bittman published an article several years ago on grilling radishes in the summer, I have been eating them grilled or sautéed. I love them cooked! Now when you grill them, the smokey taste addition is wonderful, but they lose their color and do not look so pretty. They sort of look like anemic radishes. But, when you sauté them, they somehow hold their color better. Or at least these radishes did.Raw zucchini, multi-colored radishes and a sweet Spanish onion on a black granite countertop.

These multi-colored radishes in my fridge needed to be used, along with the zucchini. My mother used to make a dish of sautéed onions and zucchini topped with grated parmesan and sharp cheddar cheese. My husband still asks for that dish every so often, so I know the combo of onions, zucchini and cheese is good. But I had some feta that needed to be used and then these oil-cured Moroccan olives were hanging around too and the dish needed a punctuation of color. So there you have it. That’s how I created this dish – really using my skillet as a palette as I do when I paint.

I think you will LOVE this!Sauteed zucchini with onions and radishes topped with feta cheese and oil-cured Moroccan olives.

SAUTEED ZUCCHINI WITH ONIONS AND RADISHES, TOPPED WITH FETA AND OIL-CURED MOROCCAN OLIVES – serves 4 – 5

3 medium zucchini – washed and thickly sliced in 1/4” slices
1 sweet Spanish onion – peeled and trimmed and sliced into 1/4” slices
6 multi-colored or red radishes – washed, trimmed and quartered
2 tbs. olive oil
1 tbs. unsalted butter
Salt
Pepper
1/4 – 1/3 cup crumbled feta cheese
1/4 cup of pitted oil-cured Moroccan olives

Warm the oil in a large skillet on medium heat, add the butter to melt. Add the sliced onions, cover and stir often, cooking for 10 – 15 minutes. Add the zucchini and radishes and toss until crisp tender. Lower heat to low. Season very lightly with salt and pepper. (remember the feta and olives are salty) Sprinkle the feta cheese and olives on top. Cover for 3 – 5 minutes to warm the cheese and olives. Serve right away using a large pancake turner to pick up a section and keep it pretty. Enjoy!

Filed Under: Dinner, Sides, Vegetables Tagged With: cooked radishes, feta cheese, grilled radishes, Mark Bittman, oil-cured Moroccan olives, sauteed radishes, sauteed zucchini with onions and radishes

Roasted broccoli & spring onions with feta

August 21, 2013 by Mary Frances 24 Comments

Broccoli and spring onions, oven roasted and topped with feta and toasted bread crumbs on a white French platter with blue trim. I am constantly looking for new flavor combinations with vegetables. I keep thinking, I’ve just have to make them more exciting, especially since we are eating less meat, and I know that a lot of my readers are vegetarians.

So last night I came up with this one. Roasted broccoli and spring onions topped with feta cheese and toasted bread crumbs. The bread crumbs were really leftover croutons that were too few for another Caesar salad, so I crushed them up in my mortar and pestle and threw them on top. Easy, right? This is why you should always make extra croutons! The more you cook, the more you can have various, ready-made ingredients at your disposal.

This was so yummy!!

ROASTED BROCCOLI AND SPRING ONIONS WITH FETA AND TOASTED BREAD CRUMBS – serves 4

1 head of broccoli
1 bunch of spring onions, ends and tops trimmed and bulbs split if large, or 1 large shallot, peeled and thickly sliced
2 tbs. olive oil
Salt
Pepper
1/4” thick slice of feta cheese
1.5 tbs. toasted bread crumbs or crushed croutons

Preheat oven to 400 degrees. Wash, trim and peel stalks of broccoli and cut lengthwise into similar sized pieces. On a baking sheet, combine the broccoli with the spring onions and toss with the olive oil. Season to taste with salt and pepper and place in the oven to roast. Check at 15 minutes and toss. Total time should take about 35 minutes or until the stems are fork tender to your liking. I love it when the broccoli florets get a little charred in places.

Place the vegetables on a platter and top with crumbled feta pieces and the bread crumbs. Enjoy!!Roasted broccoli and spring onions with feta and toasted bread crumbs on a white French platter.


Filed Under: Dinner, Sides, Vegetables Tagged With: broccoli and feta, crushed croutons, feta cheese, great side dishes, new flavor combinations with vegetables, oven roasted broccoli and spring onions, roasted broccoli, toasted bread crumbs

Provençal chicken and 2 dinners in 1!

July 20, 2013 by Mary Frances 21 Comments

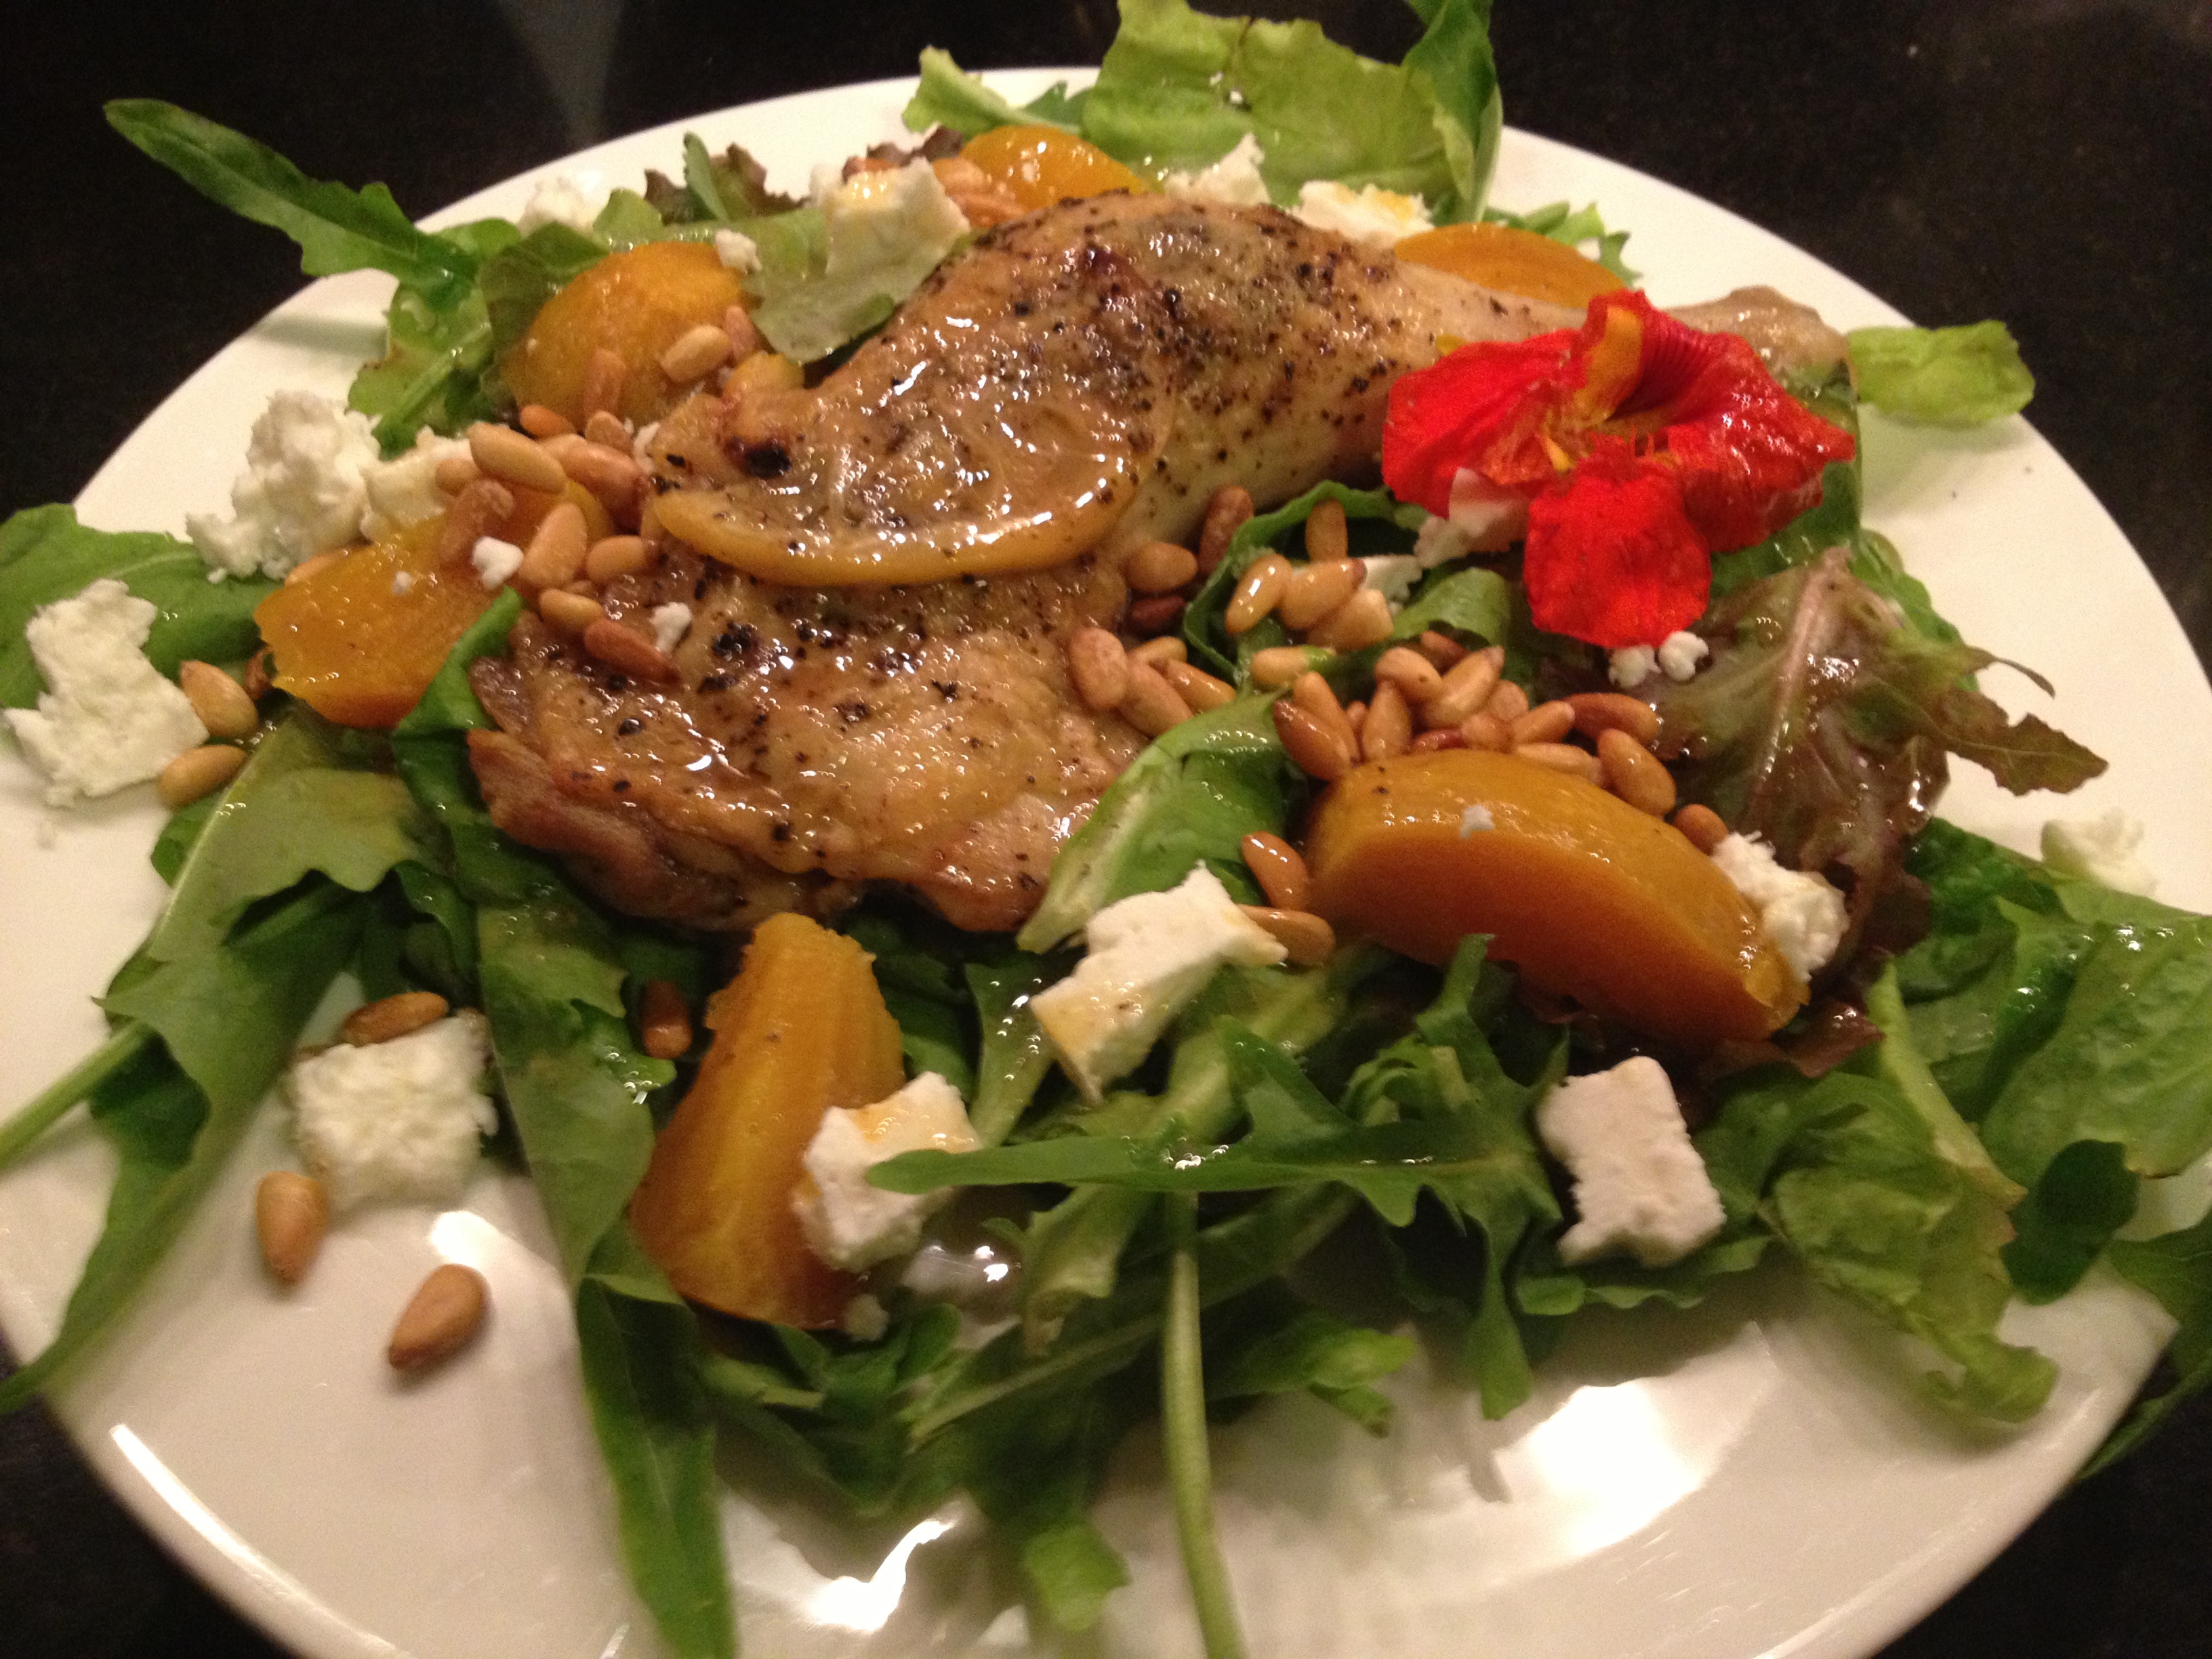
Just cut garden lettuce with nasturtiums in a colander.While this heat wave we’ve been having here on the East coast has been trying, to say the least, I love this time of year, with the bounty from the garden, which will be ending soon. (The lettuce is about to bolt and this extreme heat is not helping.) Here’s the lettuce and nasturtiums I cut from my little garden last Sunday.Dinner salad with roast chicken leg, roasted yellow beets, feta cheese and toasted pine nuts on a white Wedgewood plate.
And here is our Tuesday night dinner.

This is how you can make a quick, easy and super delicious weeknight dinner. If you think a little bit ahead, it’s a breeze, you won’t heat up your kitchen, and it’s light and healthy. Perfect for this time of year and particularly during this heat wave.

On Sunday, before I went on an hour-long bike ride, I threw a bunch of golden beets in the oven to roast. Those guys cooked and I was out of the hot kitchen! Now you all probably know how to roast beets, but just in case, here a little recipe. Beets are a great vegetable because you get two in one!! You can roast the beets and then sauté the beet stems and greens in olive oil with garlic. I almost like the greens better than the beets, and you don’t have to cook them at the same time. Beets, refrigerated will keep a long time, the greens, not so much, so use those sooner rather than later and come back here soon to see how I used them in another layered vegetable dish that was loaded with fresh flavors. Some grocery stores are now even selling prepackaged beet greens. I prefer to get the real thing, attached to organically grown beets. Who knows what they put in those bags to make them last longer in the grocery stores.

ROASTED BEETS – serves 2 – 4

1 bunch of golden or red beets
1 Tbs. olive oil
Salt
Fresh ground pepper

Preheat your oven to 375 – 425 degrees. You can roast them anywhere in this range. I like to use 400 degrees. At the lower heat, they will just take longer to become tender.

Trim the beets from the greens, scrub with a vegetable brush and dry with a paper towel. Place in the center of a good-sized piece of aluminum foil, drizzle with the olive oil, season with salt and pepper and draw up the foil to seal and make a neat packet. Place the packet in an oven proof dish (because the beets may leak and make a mess in your oven) and roast for one hour. Remove, open packet and test. A skewer should pierce the beet easily and completely. If not, put back in for 10 more minutes or so.

Once done and cool enough to handle, peel the beets and use immediately or refrigerate in a covered container and use within four or five days. They rewarm easily in a microwave as well.Provencial roast chicken legs with oven roasted broccoli and mushrooms on a white Wedgewood plate.
Here was our dinner on Sunday night, when I made Provençal chicken legs with oven roasted broccoli and mushrooms. This is easy too! I made four leg and thigh pieces for the two of us, so we could have the two dinners.

For the broccoli and mushrooms, toss those with two tablespoons of olive oil, salt and pepper and roast at 375 degrees for 35 – 40 minutes while you’re roasting the chicken.

PROVENÇAL CHICKEN LEGS – serves 4 or 2 for two dinners

4 chicken leg and thigh pieces, with skin and bones
1 Tbs. each of chopped fresh thyme, sage, rosemary, and mint leaves
1 Tbs. fresh lavender flowers (optional) or 1.5 tsp. dried
Salt
Pepper
2 – 3 Tbs. olive oil
4 dried bay leaves
4 lemon slices, seeded

Preheat your oven to 375 degrees.

Wash and dry your chicken legs. Mix together chopped fresh herbs with the lavender, salt and pepper to taste, and mix in 1 – 2 Tbs. of olive oil to moisten and make a paste. Carefully loosen the skin on the chicken on one side and place one bay leaf and one-quarter (about 1 Tbs.) of the herb mixture under the skin and spread around underneath. Make sure the skin is still attached in one or two places. Salt and pepper both sides of the chicken.

Heat the remaining tbs. of olive oil in an ovenproof skillet on medium high heat. Place in chicken legs, skin side down, and brown for 5 minutes. When nicely browned, turn legs over and place one lemon slice on each leg. Place the skillet in the oven and roast for 30 – 35 minutes, or until the meat registers 160 degrees with an instant read thermometer. Let rest for 5 – 10 minutes before serving.

So we ate 2 of these on Sunday night and saved 2 for the weeknight dinner salad. The bay leaf is not edible so remove while eating.Dinner salad with roast chicken leg, roasted yellow beets, feta cheese and toasted pine nuts on a white Wedgewood plate, overhead shot.

DINNER SALAD FOR A WEEKNIGHT HEAT WAVE – serves 2

Tender lettuce – Bibb or mesclun or homegrown
4 golden beets, roasted
2 Tbs. toasted pine nuts – oven toast at 350 degrees for 6 – 8 minutes
Greek feta cheese
2 Provençal roasted chicken legs and thighs
2 nasturtiums (optional)
Sherry vinaigrette

Warm the chicken legs in a microwave for 1 -2 minutes, depending on how powerful your microwave is. Warm beets in the microwave for 1 minute. Cut each beet into 4 or 6 wedges, depending on the size of the beets. Place lettuce on a dinner plate. Place the chicken leg on top in the middle, pour any juices on top. Arrange the cut beets around the leg, as well some crumbled feta cheese and the toasted pine nuts. Drizzle on the sherry vinaigrette and serve right away. Enjoy!!! You will LOVE this!!


Filed Under: Dinner, Poultry, Salads Tagged With: dinner for a hot summer night, dinner salads, easy roast Provencial chicken, feta cheese, garden lettuces, roast broccoli with mushrooms, roasted golden beets, toasted pine nuts

Going to Greece

September 23, 2012 by Mary Frances 12 Comments

Greek sweatshirt artWith autumn officially here, even though I love the season, here’s a way to hang on to summer for just a little bit longer.

I think it’s fun to plan a dinner around a specific theme. Not like the crazy tablescape lady on Food Network. I just learned that she is our Governor’s live-in partner! Yikes! She’s probably a nice woman but really, she’s a bit much.

We had some new friends over for dinner last Saturday. Well not really new. Anne and I did business with one another some 20 years ago! She had a creative placement agency. In those days, my company did a lot of package design for a fragrance company called Tsumara. We often needed textile designers to design the background patterns on these packages. Anne supplied me great ones on a freelance basis.

I ran into her recently at a New York Times /AMEX Business Summit. I gave her a LOVE card and she checked out the blog and recognized Ethel and Ethel’s garlic from an earlier post! We discovered our weekend houses are very close to one another. Isn’t that great?

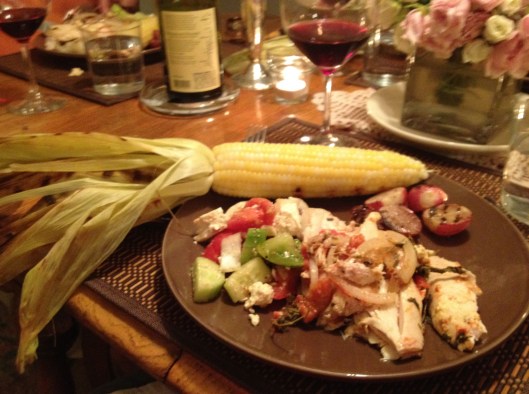
So for our dinner together, I wanted to take them to Greece. We made a grilled Greek chicken recipe that my husband and I used to make all the time after our visits to Santorini. You take a whole chicken and stuff under the skin: slices of tomatoes, covered with dried oregano, sliced onions and thin slices of feta cheese. Grill it with a lemon-based sauce and voila, you’re in Greece. They do this all over Santorini on the street outside of small restaurants and everything is so fresh and good. Serve it with a simple Greek tomato and cucumber salad and you are set. Try it – it’s delicious!!

And grab a little bit of summer one last time.

SANTORINI GRILLED CHICKEN
– serves 4

1 whole chicken – about 3.75 lbs
1 large tomato – sliced 1/8” thick
Dried oregano
Feta cheese, sliced 1/8” thick
1 small onion – sliced 1/8” thick
salt
pepper
1/2 lemon
Lemon/garlic basting sauce

Wash and thoroughly dry the chicken. Trim off any excess fat. Refresh it with a half of a lemon, squeezing the juice out all over, inside and out. Pat the chicken dry again. Cut the tomato in 4 or 5 slices. Sprinkle each slice liberally with dried Greek oregano. Carefully, use your fingers to separate the skin from the meat on both sides of the breastbone and on both sides of the backbone. Into each quarter slide one tomato slice, oregano side down, one onion slice and one good slice of feta. If you need to cut a tomato slice or onion slice in half, to fit it all in, do so. If you accidentally tear the skin, use a small skewer to sew up the tear. Salt and pepper the chicken all over to your liking.

Grill the chicken at about 350 degrees, basting with the sauce 3-4 times throughout the cooking time. It should take about 45 minutes.

You could also do this in your oven. Preheat the oven to 550 degrees. Place the chicken in for 10 minutes, then lower the heat to 350 and roast for 45 – 50 minutes, basting three times with the lemon garlic sauce during this time, every 15 minutes. Check to see if it’s done with an instant read thermometer. It should register at 155 degrees.

LEMON/GARLIC BASTING SAUCE
1.5 tbs. unsalted butter
2 tbs olive oil
4 cloves of garlic, minced
2 tbs. finely minced onion
6 tbs. fresh lemon juice
1 tbs. Dijon mustard
1 tsp salt
1 tsp. light brown sugar
1 tbs. Worcestershire sauce
20 grinds of black pepper
¾ tsp. Sriracha sauce
3 tbs. water

In a small saucepan, melt the butter in olive oil over low heat. Add garlic and onion, cover and sweat for 15 – 20 minutes. Check often, stir and do not let it brown, but you want it to be meltingly soft. Add the rest of the ingredients, except for the water, stirring well. Raise heat to medium-high and whisk in water. Stir until mixture boils and then remove from heat. This can be made a couple of hours before you’re going to use it. Keep it at room temperature.
Greek salad overhead

GREEK SALAD
– serves 4

2 – 3 large tomatoes, preferably heirloom, cut in large chunks
½ of a large red onion, cut in ½” chunks
1.5 hothouse cucumbers, peeled, halved lengthwise & cut in 1/2” chunks
1/2 cup Kalamata black olives, pitted, cut in half
Greek feta cheese, crumbled in large pieces
Extra virgin olive oil
Red wine vinegar
Salt
Fresh ground pepper
Chopped fresh oregano leaves

Place tomatoes, red onion, cucumbers, olives and feta cheese in a large bowl. Drizzle with the best olive oil you have and a few splashes of red wine vinegar. Sprinkle with a little salt (the feta will be salty so not too much), fresh pepper and 2/3 of your chopped oregano leaves. Toss lightly to combine. Garnish the top with more oregano leaves.
Greek dinner plate with Santorini grilled chicken, Greek salad, corn, and red wine.Greek dinner plate with Santorini grilled chicken, Greek salad, and corn.

Filed Under: Dinner, Poultry, Salads, Travel Tagged With: cucumbers, feta cheese, Greek roasted chicken, Greek salad, grilled chicken, kalamata olives, lemon basting sauce, oregano, red onion, Santorini, tomatoes

First course or a main meatless meal

October 29, 2011 by Mary Frances 2 Comments

Let’s bridge Greece and Italy – or let’s just use up things in my refrigerator that need using! This is fantastic and could be used as a great first course or a main meatless meal.

BUCATINI WITH EGGPLANT, FRESH TOMATOES, SPINACH AND FETA
Serves 4 as a main course or 6 as a first course

1/4 cup olive oil
5 large garlic cloves – peeled and thinly sliced on a mandoline
1 medium eggplant, cut in quarters lengthwise and then sliced 1/4” thick
1.5 lbs. fresh plum tomatoes – about 7, cored and cut into quarters lengthwise and then sliced into 1/4” slices
1/2 bunch or 4 oz. fresh tender spinach leaves, (or baby spinach) stems removed, washed and air-dried
2 oz. Greek feta cheese, cut in 1/4 cubes
1 lb. dried bucatini No 6 pasta or spaghetti or fettucini
Pecorino Romano cheese, freshly grated
Chiffonade of basil to garnish

Prepare the eggplant and salt layers of it in a mesh colander to draw out and drain the bitterness. Use fine sea salt. Let sit while you prepare everything else, the longer the better, but do this for at least 20 minutes.

Prepare the tomatoes and place in a separate large bowl and salt it as well with sea salt, toss with a spatula and let sit. This will intensify the tomato flavor.

Warm the olive oil and sauté the sliced garlic on very low heat for 10 – 15 minutes. Do not let it brown.

Start a large pot of salted water to boil for the pasta.

Cut cheese and slice the basil leaves.

Take paper towels and squeeze and dry the eggplant and add to the skillet with the garlic and olive oil. Raise heat to medium and sauté until the eggplant is fork

tender. When the skillet becomes dry, drain the tomatoes in the same mesh colander and add their juices to the skillet.

Cook the pasta al dente and drain, saving some pasta water, just in case you need a little moisture.

In a large bowl you used for the tomatoes, layer 1/3 pasta, 1/3 fresh tomatoes, 1/3 eggplant mixture, 1/3 spinach, feta cheese and grate some pecorino on each layer. Continue until all is used up, pour in any extra tomato juice and toss and combine. The heat from the pasta and eggplant will warm the tomatoes, wilt the spinach and melt the feta. Garnish with more pecorino and the chiffonade of basil.

I hope you LOVE it!

Cut and salted eggplant.

cut salted eggplant

Chopped and salted tomatoes in a yellow bowl.

chopped salted tomatoes

Pasta with eggplant, tomatoes, and feta in a yellow bowl.

Finished dish before basil garnish

Filed Under: Dinner, First Course, Lunch, Vegetables Tagged With: basil, bucatini, eggplant, feta cheese, meatless meals, pasta, pecorino, plum tomatoes, tomatoes, vegetarian

Join 32k+ followers!


Never miss out on a recipe!

Subscribe to receive new posts via email:

Mary Frances

Mary Frances

Spread love through cooking.

Summer Favorites

Easy Cheesy Sautéed Squash The Best Potato Salad Super Quick Chicken and Summer Vegetables Stir-fry Chimichurri-ed Wilted Endives with Walnuts Chilled Curried Zucchini Soup with Apple Garnish Best Strawberry and Rhubarb Crisp to make now!

Categories

  • Appetizers
  • Breakfast
  • Brunch
  • Cocktails
  • Contest
  • Cookies
  • Cookware and tools
  • Desserts
  • Dinner
  • Events
  • First Course
  • Fish
  • Food Responsibility
  • Guest Post
  • Lunch
  • Meat
  • Pasta
  • Poultry
  • Products for sale
  • Salads
  • Sauces
  • Sides
  • Soups
  • Tea time
  • Travel
  • Vegetables

Pages

Blog
About
Recipes
Tips and Tools
International Love
Love Notes
Shop
Mary's secret ingredients

Blogs We Love

  • 1840 Farm
  • A Pug in the Kitchen
  • Cottage Grove House
  • Food, Photography & France
  • Food52
  • From the Bartolini Kitchens
  • Go Bake Yourself
  • Hotly Spiced
  • Jovina Cooks Italian
  • Lavender and Lime
  • Orgasmic Chef
  • Smitten Kitchen
  • Sophie's Foodie Files
  • Steven’s Wine and Food Pairings
  • That Skinny Chick Can Bake
  • The Pioneer Woman
  • The Squishy Monster
  • Tips on Food and Drinks
  • Yummy Chunklet
  • LOVE - the secret ingredient


  • GET IN TOUCH
  • E mary@lovethesecretingredient.com

· All Rights Reserved ·© 2016 Love- the secret ingredient. All rights reserved. Disclaimer | Privacy Policy Disclosure Policy Terms & Conditions