• Blog
  • About
  • Recipes
  • Tips & Tools
  • International LOVE
  • Love Notes
  • Shop
  • Powered by MSI Media Group

Engaging stories of love, joy, comfort and friendship with proven scrumptious, healthy recipes, we celebrate LOVE as the secret ingredient for wonderful food!

Sauteed kale with roasted delicata squash

November 11, 2013 by Mary 20 Comments

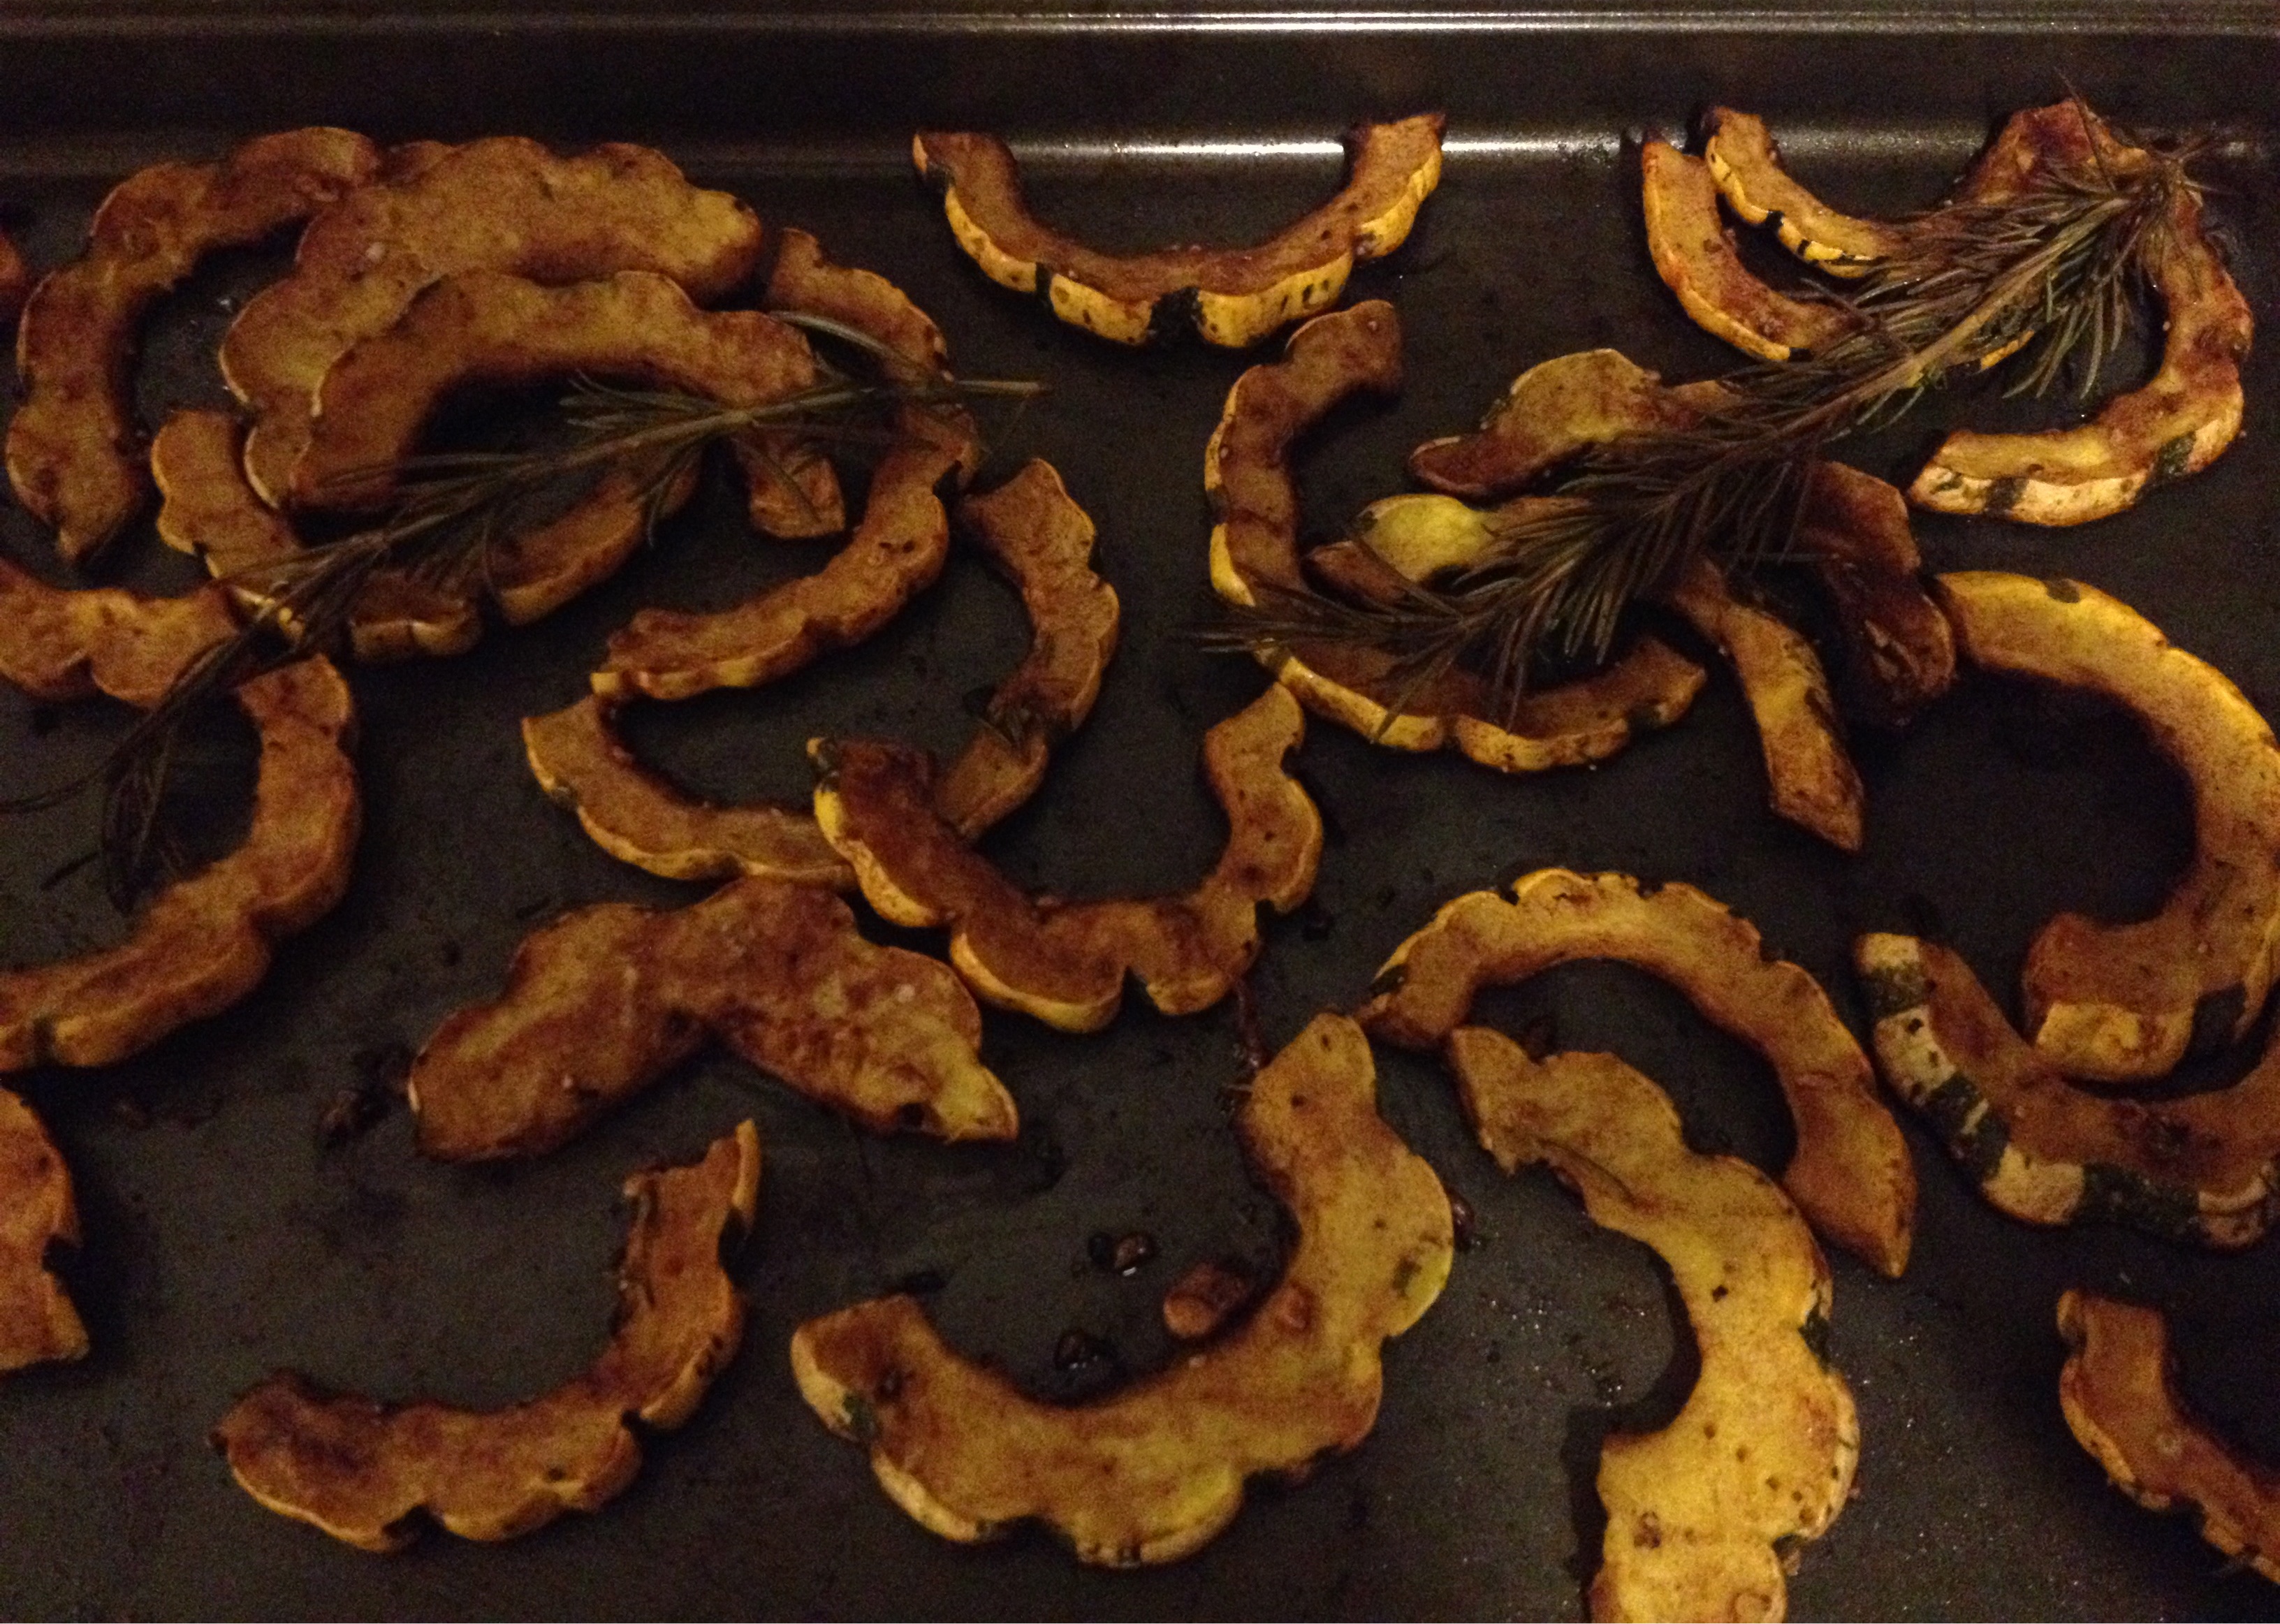
Last Sunday night, we had dinner at our older son’s home in Williamsburg, Brooklyn. I must admit, I kind of invited us. Well, I wanted to see them and he is not fond of traveling way uptown to our apartment on a Sunday night so what’s a mom to do? He and his girlfriend put out an amazing spread.Pasta with a hot red sauce, grating parmigiano cheese on top.We started with a first course of pasta with a beautiful Arrabbiata Sauce sauce topped with parmigiano. This kid lived in Italy for six months and of course the dish was perfect. The pasta was cooked perfectly; the sauce was the perfect consistency. The spice and the blending was sublime. He knows what he’s doing. Roasted chicken on a board with rosemary and lemon garnish.The main course was roasted chicken with herbs, sauce au jus, and sautéed kale tossed with roasted delicata squash, which was very different and terrific. His roasted chicken was perfect, as to be expected. He’s got that down. But the vegetable dish was really, really lovely. Unexpected, and a perfect autumn dish. The combo was unique – a sweet and slightly spicy blend. And healthy to boot!Roasted deicata squash on roasting pan.
His girlfriend gave me the skinny the next morning.

SAUTEED KALE WITH ROASTED DELICATA SQUASH – serves 4

1 delicata squash, cut in half lengthwise, seeds removed and cut into slices
Olive oil
Salt
Pepper
Cinnamon
2 fresh rosemary sprigs
1 bunch kale, washed, stemmed and cut into 1” strips
Hot pepper flakes

Preheat oven to 400 degrees. Toss squash and rosemary sprigs in 1 – 2 tbs. olive oil and spread out on a baking sheet. Sprinkle on salt, pepper and cinnamon and roast for 15 – 20 minutes until fork tender.

Heat 2 tbs. olive oil in a skillet on medium to medium-high heat. Toss kale, for 2 minutes. Cover the pan for about 3 more minutes. Sprinkle on salt, fresh ground black pepper and hot pepper flakes. Toss until tender.

Add the squash to the skillet and toss to combine. Serve immediately. Enjoy!!

Now his girlfriend is also an expert dessert maker. Just look at this beautiful chocolate wonderfulness we had for dessert.Chocolate tart with a graham cracker crust and whipped cream.We are soooo lucky!!

Filed Under: Sides, Vegetables Tagged With: chocolate tart, delicata squash, kale, roasted chicken, sauteed kale with roasted delicata squash

Rachael Ray

November 5, 2013 by Mary 18 Comments

I saw Rachael Ray at a Hudson Union Society event at the Cornell Club last night. She seems like a nice person, bubbly and drinking red wine throughout her interview with Joe Pascal. She has this new book out, Week in a Day – Five Dishes, One Day.

I would say though that she doesn’t look quite so… svelte as she does on the cover. Rachael Ray cookbook - Week in a Day.

My concern with Rachael’s food is that many of her recipes are very high in calories and fat — one stick of butter or one cup of feta cheese in a recipe for a dish to serve four people! That’s just way too much. This is on the road to the Paula Deen lifestyle.

Rachel’s idea with the book is to use one day to make five meals for the week. That is certainly one way to tackle making your meals. I, however, look forward to the unwind time of making a meal at night.

I wasn’t always like that though. Truth be told, when my kids were young, I was fortunate enough to have full time, live-in help in NJ and our wonderful Jennifer had dinner made on the stove, waiting for us every night when we came home from work. So when Zach went off to college and we moved back into the city, cooking dinner every single night was new to me and a harsh reality at first. But once you get the hang of it, it’s good! In fact, if we have to go out too many nights in a row with business functions, I miss cooking. As I said, it’s a time to unwind, have a sip of wine and create something delicious with beautiful vegetables and herbs. I like to imagine what I want to eat and then see if I can achieve the flavor profile I’m looking for. It’s a design game with food!

Rachel’s idea is to encourage more people to feel empowered to cook a meal at home. That is my goal too — but not with unhealthy ingredients and portions. Because then you will not feel good, look good or have the pure energy to truly LOVE and enjoy life — because that is what it’s all about! Your body is an incredibly strong yet delicately balanced machine and you need to feed it with respect.

At this event, after the interview, the floor was opened to questions from the audience and the first question was about her use of fat and rich ingredients in her recipes. She responded that she eats pasta and macaroni and cheese and LOVES cheese and all those things. That’s ok of course — and it’s important to enjoy yourself — but all things in moderation.

I will never forget when my youngest son, Zach (who gave me the inspiration to write this blog and share my recipes) was eating a pasta dish one of our friends so nicely made for us when we moved. It was ziti with loads and loads of mozzarella and parmigiano cheese, butter, sausage, tomatoes, etc. He loved it! He was eating it slowly and said, “This is soooo good. You would never make something like this.”

And he was so right.

Filed Under: Cookware and tools Tagged With: Cornell Club, Hudson Union Society, Rachael Ray, Rachael Ray cookbook

Hearts of Palm on a Salad

November 2, 2013 by Mary 11 Comments

Hearts of palm salad as a first course on a glass plate.Hearts of palm. What the heck are they? I’ve always liked them. My father used to like them and served them on special occasions. I’m sure my parents thought they were exotic. They are canned – I don’t use very many canned items but this one has piqued my interest again. I have never seen them fresh but maybe they’re only sold fresh in more tropical areas. Remove them from the can, drain, and rinse. Only buy the full spears and slice. I think they add interest to a simple green salad and make it really different.

So I looked them up and found out that they are a vegetable harvested from the soft core of a palm tree! They are very low in cholesterol, a good source of protein, riboflavin and potassium, and a very good source of dietary fiber, vitamin C, folate, calcium, iron, magnesium, phosphorus, zinc, copper and manganese. Who knew? They’re even good for you!

Now this is the sad part. Many wild species of palm serve as sources for hearts of palm, including coconut palms, Acai palms, and sabal palms. Unfortunately, the harvesting process kills these trees, because they only have one stem, and extracting the inner core essentially destroys the plant. In response to this issue, several palms have been domesticated and bred specifically for production of this vegetable. These trees have multiple stems, allowing farmers to harvest the hearts while allowing the rest of the tree to live. Thank goodness!

But most importantly, this simple salad is really refreshing and delicious. I also used the roasted almonds I talked about a few posts back. I hope you LOVE it as much as my husband and I did!

HEARTS OF PALM ON A RED LEAF LETTUCE SALAD – serves 2 as a first course

1/3 of a head of red leaf lettuce, washed and spun dry
2/3 of a can of hearts of palm, drained, rinsed, patted dry and sliced
2 small tomatoes, cut in wedges
12 roasted and salted whole almonds, cut in half
Sherry vinaigrette

Arrange torn lettuce leaves on a salad plate. Place sliced hearts of palm in the middle. Arrange tomato wedges around the hearts of palm. Sprinkle chopped almonds on top. Drizzle on salad dressing. Serve immediately.


Filed Under: First Course, Salads Tagged With: first coarse salads, hearts of palm, red leaf lettuce, roasted almonds, sherry vinaigrette, simple salads

Made-in-the-Pan Chocolate Cake

October 30, 2013 by Mary Frances 20 Comments

This past weekend, I made two desserts, as I was having two dinner parties. Our friends were coming to dinner on Saturday night in the country and both boys and their girlfriends were coming to dinner on Sunday in the city. Additionally, my husband was going to visit his 94-year-old mother in Baltimore on Monday and needed to take sweets to her. It’s what she craves and I aim to please. So on Saturday I made both desserts.

One was a favorite Christmas cookie in our family that I just cut into larger squares for dessert. Our boys were saying, “Mommm, a little early don’t you think?” And then one of the girlfriends said at the dinner table, “OMG, these are so good, I could eat these until I vomit!” Now how’s that for a compliment? She said she ate two for breakfast the next morning and then wanted the recipe. That was for the Hello Dolly Squares. And then the other dessert I made was this amazing recipe from Mollie Katzen for her Made-in-the-Pan Chocolate Cake. I heard her speak a few weeks ago at a Hudson Union Society event and someone in the audience brought up this recipe, which she then talked about and read aloud.
One piece of Made-in-the-Pan chocolate cake with vanilla ice cream and fresh raspberries.

It is so quick, easy and truly amazing that it works. It is even vegan!!! – which I personally don’t care about, but if you do, then this is for you!

The key is to mix the dry ingredients incredibly well with a whisk. Use a clear glass pan and pick it up to inspect the bottom and sides to make sure you don’t see any globs of white flour or dark cocoa still lingering around. Then when you add the liquids, slowly stir and whisk and scrape and scrape and whisk until all is combined and smooth. No lumps allowed!! Simple, delicious, and no extra bowls to clean. This is a super moist cake that tastes like a lot more work. You can pull this off with ease on any weeknight for surprise guests. Just make sure you always have cocoa around.

MADE-IN-THE-PAN CHOCOLATE CAKE – serves 9

1 1/4 cups unbleached white flour
1/3 cup unsweetened cocoa
1 cup sugar
1/2 tsp. salt
3/4 tsp. baking soda
1 cup water
1/3 cup canola or vegetable oil
1 tsp. vanilla extract
1 tsp. cider vinegar or white vinegar

Preheat oven to 325°F. Have ready an 8-inch-square glass baking pan. Put flour, cocoa, sugar, salt and baking soda into the pan. Mix it together thoroughly with a whisk and spatula making sure all is blended together and no white flour clumps are visible. Lift up the pan and check to make sure all is blended on the bottom and especially in the corners.

Add water, oil, vanilla extract and vinegar. Stir slowly with a whisk in small circles to blend. As it becomes a batter, mash, scrape, and stir with whisk and spatula until smooth, particularly scraping and blending from the corners of the pan.

Scrape the sides with a rubber spatula, and spread it evenly. Clean the edges, then bake for 30 minutes.

Cool completely in the pan, on a rack.  Dust with some powdered sugar (there is no need for frosting) and cut into squares.

I served it with LOVE, a dollop of ice cream and a few raspberries for a really pretty and super easy dessert.

Filed Under: Desserts Tagged With: coconut, easy chocolate desserts, graham crackers, Hello Dolly Squares, Made in the pan chocolate cake, Mollie Katzen, pecans, raspberries, vanilla ice cream

Nuts!! – specifically almonds

October 22, 2013 by Mary Frances 28 Comments

I LOVE nuts! And no wonder, I just learned that almonds are a symbol of LOVE and happiness! The early Romans showered newlyweds with almonds as a fertility charm and the nut was a symbol of good luck for centuries throughout southern Europe. I once even heard that if you eat 6 raw almonds before drinking, you won’t get a hangover.Raw almonds in a small crystal bowl.

Do you think that could work?

Nuts in general got a really bad rap some years ago. We all knew that they were delicious and fatty but luckily, we’ve discovered that this fat is good for you and is even known to lower blood LDL cholesterol levels. An ounce of almonds gives you 35% of your daily allowance of vitamin E, which is a powerful antioxidant to keep you healthy all winter. They also have other vitamins and minerals, are cholesterol free and a good source of fiber – all good stuff!Roasted almonds in a glass crystal bowl.

Recently, I’ve been toasting raw almonds in peanut oil and fine sea salt. Everyone I serve them to is like, OMG – where’d you get these?

So I know this is a stupid simple thing to do, but I thought I’d share it as it has received such high praise from everyone. Now that the holiday season is coming upon us, a nice cute little jar of these roasted almonds would make an awesome hostess gift. After all, years and years ago, gifts of almonds represented happiness, romance, good health and fortune. Not bad, eh?

These are great during cocktail hour or chop some up and throw them on a salad or oatmeal. They don’t take long to make at all and you will LOVE them!

Just be sure to check you’ve toasted them all the way through by cutting them in half and seeing if the brownish roasting effort reach the center of the nut.Roasted almond, cut in half.
ROASTED WHOLE ALMONDS WITH SEA SALT

1.5 cups of raw whole almonds
2 tbs. peanut oil
Sea salt

Preheat oven to 350 degrees. Toss almonds with peanut oil and season with sea salt. Roast in the oven for a total of 13 minutes. Toss at 6 minutes so that browning is even. Check at 12 minutes by cutting an almond in half and making sure it is toasted inside. When done, remove pan from the oven and salt them again with the fine sea salt and let cool in the pan. Toss again and taste for the proper salt level. Store in a tightly covered container. Enjoy!!Two crystal bowls of almonds, roasted and raw

Filed Under: Appetizers Tagged With: almonds, nuts, raw almonds, roasted salted almonds, toasted salted almonds

Get it Right spatulas

October 18, 2013 by Mary 8 Comments

Get It Right spatula in hot pin with packaging.Some time ago, the good folks at GIR sent me one of their spatulas to try out. I have so enjoyed using it but haven’t had time to write about it until now. This Get It Right spatula is totally made of one piece of seamless silicone, which makes it super easy to handle, plus they come in super bright nifty colors. They sent me a hot pink one.

I have this awful habit of leaving spatulas or other stirring equipment in the pot or skillet that I’m using them in. In the one cooking class I ever took at ICE (Institute of Culinary Education), the teacher yelled at me for doing this, and rightfully so. I know it’s not right! I think I do this because I am always rushing around, usually hungry and it’s late, trying to be a short order cook, plus I want to keep the stirring utensils separate from one another. Then, usually the handle will get hot while sitting in there and I’ll pick it up and low and behold, burn myself again!! I have many scars on my hands and lower arms from dumb moves such as this.
Get It Right spatula in a pan of red stemmed, organic dandelion greens with garlic.This spatula is great as a stirring and sauteing vegetables tool and, you’ll never get burnt even if you leave it in the pot. Here you can see me using it to make some sautéed organic red stemmed dandelion greens with garlic in olive oil. It looks great, right? This was the worst freaking vegetable dish I have made in a very long time. (You couldn’t chew them! I guess you have to braise them?) But, the stirring instrument was wonderful!

I have one caution about it. It is not flexible enough to really scrape a bowl of a luscious sauce. But as a cooking instrument, it works! And, I love the colors. A red one would be nice for LOVE, don’t you think?

Filed Under: Cookware and tools Tagged With: dandelion greens, Get It Right, hot pink spatulas, organic dandelion greens, red-stemmed, spatulas

Chicory salad with walnuts and parmesan

October 11, 2013 by Mary Frances 32 Comments

A head of the most beautiful chicory.

Chicory. I grew up with the smell of baked root chicory brewing with coffee that my father got from his Southern business colleagues. It’s a New Orleans favorite and he traveled there often. My mother and father just loved it and I remember that very distinctive smell. I think it made Mom and Dad feel special and exotic. No one in our St. Louis suburb of Webster Groves had ever heard of it in those days. So just recently, on this past Father’s day, my son made a warm wilted green salad of chicory to go with his Beef Wellington he made for my husband. It was a riff on a recipe from Tyler Florence. Tyler wants you to use Swiss chard, radicchio or escarole. I liked my son’s choice of chicory much better. I loved that salad so much that I have tinkered with it and made this chicory salad with walnuts and parmesan mine.

Chicory is a bitter green but with the dressing of warm honey and balsamic vinegar, it combats the sharpness and just makes the whole thing interesting and a bit addictive. Then adding the chopped toasted walnuts along with a bite here and there with a sliver of Parmigiano Reggiano, and well, I think you have a little bit of heaven in your mouth.

At our upstate farmer’s market last week, they had the biggest, most beautiful head of chicory. I was smitten and grabbed it up and starting excitedly telling the farmer about my recipe and what I was going to do with it. Suddenly, I noticed that everyone around was listening and taking notes. The farmer was so happy to hear my recipe as he said that most folks just don’t know what to do with chicory. Poor misunderstood thing, it needs some new positioning as a favorite wilted salad green, as it is mine. Try this and you’ll fall in LOVE too!Chicory in a bowl with shallots.

WILTED CHICORY SALAD WITH WALNUTS AND PARMESAN – serves 3 – 4

1/8 cup honey
1/4 cup balsamic vinegar
1/2 cup of toasted walnuts, coarsely chopped
1 medium or ½ large head of chicory, washed, spun dry and cut into 1½” pieces
1 shallot, very thinly sliced
½  tbs. grainy mustard
½  cup extra-virgin olive oil
Parmesan cheese shavings, for garnish

Preheat oven to 375 degrees. Place walnuts in a baking dish and toast for 7 – 8 minutes. When you can just begin to smell them, remove from the oven and let cool on a cutting board. Coarsely chop and set aside.

Cook honey and balsamic together over medium-high heat in a small saute pan, about 5 minutes, stirring constantly with a whisk. Do not let it boil. Pile chopped chicory and sliced shallots in a large salad bowl.  Whisk the grainy mustard into the balsamic-honey dressing, then whisk in the extra-virgin olive oil. Season the dressing with salt and pepper to taste and pour over greens and shallots. Toss. Toss in toasted chopped walnuts, and garnish with shavings of Parmesan and serve immediately.

Enjoy!
Warm wilted chicory salad with chopped toasted walnuts and parmesan cheese with a honey balsamic dressing.

Now because these greens are so sturdy, the leftovers even held up for the next day. Of course they weren’t as good as when first made but they were still respectable. I do have one sister-in-law who loves a day old salad, all wilted and wet. I guess it’s an acquired taste?


Filed Under: Dinner, First Course, Lunch, Salads Tagged With: chicory, chicory salads, honey and balsamic vinegar dressing, parmesan slivers, toasted walnuts, warm salads, wilted salads

Roasted Patty Pan Squash with Fennel, Green Peppers and Tomatoes

October 4, 2013 by Mary Frances 22 Comments

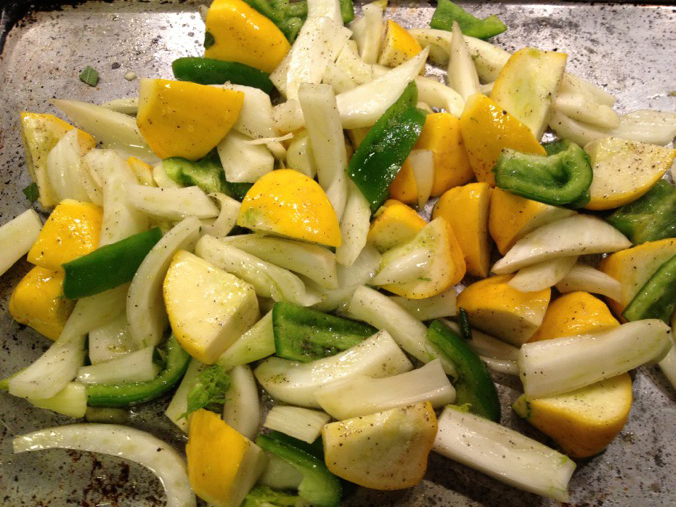
Roasted patty pan squash, fennel, green pepper and fresh tomato in a white serving bowl.I made this really simple, unusual, clean and fresh tasting vegetable dish the other night that I wanted to share with you. It’s so simple, it’s stupid. But I thought that sometimes we don’t always think of things when we’re rushing to satisfy hungry stomachs at the end of a very busy day. And I am always looking for new flavor combinations with veggies, just to take them up a notch. Aren’t you? Now this combination of roasted patty pan squash with fennel, green peppers and tomatoes was just fantastic! It was different and just look at how pretty it was! I added the tomatoes at the end for color but of course they added taste too.

The local farmer’s markets are dwindling down with product assortment, but there is still squash and the most robust smelling green peppers and actually, the fennel I got at the grocery store. Try this combo – if all of your ingredients are really fresh, it’s divine!
IMG_8592

ROASTED PATTY PAN SQUASH WITH FENNEL, GREEN PEPPER AND TOMATOES – serves 3 – 4

4 – 5 small patty pan squash- cut in 1” cubes
1/2 of a large fennel bulb, cut in 3/8” strips and then cut strips in half
1 small green pepper, cut in 3/8” strips and then cut strips in half
2 tbs. olive oil
Salt
Pepper
1/2 of a large tomato cut in cubes

Preheat oven to 425 degrees. Combine the squash, fennel and green pepper on a rimmed baking sheet. Drizzle with the olive oil. Salt and pepper to taste. Toss to thoroughly combine and roast for 20 – 30 minutes until squash is just fork tender.

Place in a serving bowl and fold in the tomatoes to warm them up and serve with LOVE.

Enjoy!

Filed Under: Dinner Tagged With: patty pan squash, roasted fennel, roasted green peppers, roasted vegetables, tomatoes folded in, unique roasted vegetable combinations

Indian Feast

September 30, 2013 by Mary 24 Comments

I love to learn about other cultures and their food traditions. And I love Indian food! Our good friends, Sumantra (from Calcutta) and Indrani (from Delhi), threw a big Indian feast on Friday night. We were celebrating Sumantra’s son, Sourav, heading off to Oxford for a year abroad of studying economics and Sumantra’s mom, who has been visiting for the past 6 months, returning to Calcutta this coming week. Her name is Manisha.

When Indrani invited us, I naturally asked if I could bring anything and she’s so sweet, she said, no it was a working day for me so I shouldn’t be bothered about bringing anything, just bring myself and my husband. Ha! It was a working day for her too. She came home at 2 pm and here’s the spread she had ready at 7 pm. Isn’t it gorgeous?Indian feast - homemade with roasted goat, shrimp, paneer and vegetable patties.So from the top, going clockwise, we have an amazing roasted goat dish using Manisha’s recipe, a bean dish with wonderful complex layered flavors, terrific vegetable patties, dal, a delicious paneer, boxes of dessert cheese balls waiting for their presentation time, homemade chutney with dates, a shrimp dish and rice and peas in the middle.

Manisha Sen.

Manisha – she told me she likes big bindi dots!

Indrani is a great cook and she has often remarked about how Manisha is a really wonderful cook. So we were the lucky beneficiaries of both on Friday. Indrani used Manisha’s recipe for the goat, which was wicked good. And you can tell that Indrani instinctively cooks with LOVE, as everything was so delicious and their apartment was brimming with all good feelings. I ate more than I should have, but I’m not sorry!

Indian food is layered with complex flavors. Sometimes the spice kicks in on the back end. The ingredient list for any of the recipes is always long, yet the flavor payoff is great. And as Indrani says, the best part about cooking Indian food is that you can make everything ahead of time and just keep it warm in the oven until ready to serve.

This was quite a celebration of all good things and a wonderful party. A great time was had by all. But I forgot to take a picture of Indrani, Sumantra and Sourav. 🙁 Next time!!

Filed Under: Dinner, Fish, Meat Tagged With: Bengali food, chutney with dates, Indian feast, paneer, rice and peas, roasted goat, shrimp, vegetabel patties

Lovely Lemon Bars

September 27, 2013 by Mary Frances 25 Comments

Lemon bars on a off white china plate with a fresh strawberry.

Lovely lemon bars you will LOVE!

I adore lemon bars. My mother used to make them for us when we were kids. I loved having them in my lunch bag. I loved the powdered sugar on top and the buttery crust on the bottom. I loved the fact that it was a rectangle. (The graphic designer in me at an early age.) And I loved licking the last bit of powdered sugar off of the Saran wrap.

When we moved into our NYC apartment six years ago, my friend Leslie and her husband Rainer came to visit. Leslie and I went to high school together in Webster Groves, Missouri. And now we both live here. Her last name started with Pa and mine started with Pi so our lockers were right next to one another for our four years at Nerinx Hall. The nuns liked that type of organization.

Leslie brought the cookbook from Tartine, the famous pastry shop in San Francisco, as a housewarming gift. It is a beautiful book filled with the richest recipes for sweet and savory specialties. We’re talking mucho butter. She wrote on the opening page, “…when things get a little crazy living in crowded New York … just remember to enjoy one of the desserts in this book – and you will return to a mellow state as “DESSERTS” is actually “STRESSED” in  reverse!”

Now I really don’t like to cook with a lot of butter. I consider myself a clean and healthy cook, which I really am. (Do I sound like I’m trying to justify myself here? Yes I am!)

But you see, every once in while, you can splurge. And this is a recipe to splurge on. This is a heightened, no, magnified version of my mother’s lemon bars. An adult lemon bar. A sinful lemon bar. These have the richest, buttery crust with the addition of pine nuts for a surprising delightful crunch. The lemon filling is so so lemony. No fooling around here. This is one serious, OMG lemon bar.

Just give these a go. Add your own LOVE and you will have everyone drooling. Truly!
Lemon bars on a off white china plate with a fresh strawberry in an overhead shot.

LEMON BARS ON BROWN BUTTER SHORTBREAD – makes 12 bars – from the Tartine cookbook

CRUST FOR LEMON BARS
½ cup of confectioner’s sugar
1½ cups of all-purpose flour
¾ cup of unsalted butter, at room temperature
½ cup of pine nuts (optional)

FILLING FOR LEMON BARS
½ cup of all-purpose flour
2 1/4 cups of sugar
1 cup + 2 tbs. of lemon juice
Lemon zest, grated from 1 lemon
6 large whole eggs
1 large egg yolk
1 pinch of salt
confectioner’s sugar for topping (optional)

Preheat oven to 350 degrees. Butter a 9-by-13-inch baking pan.

MAKE THE CRUST
Sift the confectioner’s sugar into the bowl of a stand mixer fitted with the paddle attachment. Add the flour and stir to mix. Add the butter, and pine nuts (if using) and beat on low speed. Beat just until a smooth dough forms.

Transfer the dough to the prepared pan and press evenly into the bottom and ½ inch up the sides of the pan. It should be about ¼ inch thick. Even out the crust by using the flat bottom of any type of cup, pressing down firmly. Line the crust with parchment paper and fill with pie weights, dry rice or peas. Bake for 25 – 35 minutes. Make sure the color is a deep golden brown color. Rotate the pan if the crust appears to be baking unevenly.

MAKE THE FILLING
While baking the crust, make the filling. Sift the flour into a mixing bowl. Add the sugar and whisk until blended. Add the lemon juice and zest and stir to dissolve sugar. In a separate mixing bowl, whisk the eggs and egg yolk with the salt. (This breaks down the protein.) Add the eggs to the lemon juice mixture and whisk until well mixed.

When the crust is ready, pull out the oven rack that is holding the baked crust. Remove the weights and put pan back on the oven rack. Pour the filling directly into the hot pan – it is easiest to do so when the pan can slide right back into the oven.

If the crust has come out of the oven and cooled down before you have finished making the filling, put it back in for a few minutes so that it is hot when the custard is poured into it.

Reduce the oven temperature to 300 degrees. Bake for 30 – 40 minutes just until the center of the custard is no longer wobbly.

Let cool completely on a wire rack, then cover and chill well before cutting. Use a sharp knife and cut it into 12 squares. You can serve with confectioner’s sugar dusted on top of the squares. They will keep in an airtight container or well covered in the baking dish in the refrigerator for up to 4 days. I have also wrapped each one individually in plastic wrap and carefully placed 4 of them in a large Ziploc bag and frozen them to serve at a later date. Thaw in the refrigerator and touch up the powdered sugar and serve. No one will know you made them weeks ago.


Filed Under: Desserts Tagged With: lemon bars, Nerinx Hall High School, Tartine cookbook, Tartine pastry shop, Webster Groves MO

  • « Previous Page
  • 1
  • …
  • 28
  • 29
  • 30
  • 31
  • 32
  • …
  • 54
  • Next Page »

  • Facebook
  • Instagram
  • Pinterest
  • Twitter

Join 32k+ followers!


Never miss out on a recipe!

Subscribe to receive new posts via email:

Mary Frances

Mary Frances

Spread love through cooking.

Summer Favorites

Easy Cheesy Sautéed Squash The Best Potato Salad Super Quick Chicken and Summer Vegetables Stir-fry Chimichurri-ed Wilted Endives with Walnuts Chilled Curried Zucchini Soup with Apple Garnish Best Strawberry and Rhubarb Crisp to make now!

Categories

  • Appetizers
  • Breakfast
  • Brunch
  • Cocktails
  • Contest
  • Cookies
  • Cookware and tools
  • Desserts
  • Dinner
  • Events
  • First Course
  • Fish
  • Food Responsibility
  • Guest Post
  • Lunch
  • Meat
  • Pasta
  • Poultry
  • Products for sale
  • Salads
  • Sauces
  • Sides
  • Soups
  • Tea time
  • Travel
  • Vegetables

Pages

Blog
About
Recipes
Tips and Tools
International Love
Love Notes
Shop
Mary's secret ingredients

Blogs We Love

  • 1840 Farm
  • A Pug in the Kitchen
  • Cottage Grove House
  • Food, Photography & France
  • Food52
  • From the Bartolini Kitchens
  • Go Bake Yourself
  • Hotly Spiced
  • Jovina Cooks Italian
  • Lavender and Lime
  • Orgasmic Chef
  • Smitten Kitchen
  • Sophie's Foodie Files
  • Steven’s Wine and Food Pairings
  • That Skinny Chick Can Bake
  • The Pioneer Woman
  • The Squishy Monster
  • Tips on Food and Drinks
  • Yummy Chunklet
  • LOVE - the secret ingredient


  • GET IN TOUCH
  • E mary@lovethesecretingredient.com

· All Rights Reserved ·© 2016 Love- the secret ingredient. All rights reserved. Disclaimer | Privacy Policy Disclosure Policy Terms & Conditions